GameZine Template (BT) ??

GAMEZINE'S LOGO

Hi Guys.........., In my previous post, I wrote that Blogger Template Gamezine is for sell. The reason was Laptop. Yes I didn't have any laptop or PC to convert WP Themes in that time ....

Telling this story I remembered my old computer PC once, MSI K7N2, now its only a piece of antique stuff in my museum.

woops.... skipping and jumping ...........

"Darling, this is for you... :)"
"Honey, I'm not asking the laptop to you ... why you give it to me.... !!!!"
"All that I have is yours too.... Now, use it whatever you like"
psssttt.......quite little bit.... I didn't say anything.......

That is the conversation about me and my wife, Sophie. My wife give her laptop to me.
Because of that, Gamezine Blogger Template will be Unlocked and free to everywhere ....
Of course, this GAMEZINE is with our special setting... Cahaya Versions...

But, still, I have to say that "I didn't do anything". Cahaya Biru also want to say special thanks to Jinsona and his lovely WP Themes Web Gallery, web2feel.com for creating and publishing Gamezine. Thanks dude ... :)

All I need now is little time to write some instructions guide of Gamezine Blogger Template (BT) in next post .... :)

ARE YOU READY FOR GAMEZINE .............. :) :)


NB:
If you like my work and want to help me to increase this blog .. . you could press donate button and send some amount .... :) :) :)

Zinmag Futura


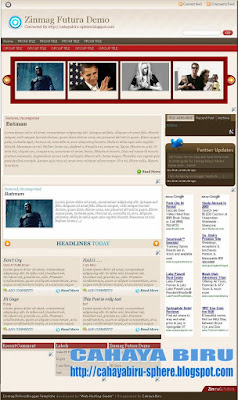
This day, I would like to launch Zinmag Futura Blogger Template. This template is originally from WP Theme and made by Jinsona. Then I convert it to Blogger Tempate.

Thanks dude... for creating a very nice WP Themes.

Overview:
Name : Blogger Template Zinmag Futura
Original From : Zinmag Futura WP THEME
Original Author : Jinsona Designs
Converted to blogger by : Cahaya Biru

Template Feature :
1. Magazine Style with inline posting
2. Auto readmore included
3. Glide Content with up-down toggler
4. Slider with right-left toggler
5. Featured Post
6. Nice Chocolate Twitter Header
7. Post Focus included**
8. Menu

**Post Focus, its mean that you will not see the Slide, Glide, and Featured section when you enter the single post article. I have another name of it "You can see me in front, but not in behind"... heheheh :D

Any theory about it?? tell me...

Clearly, The Slide, Glide, and Featured secton is all gone when you enter the single post article. Isn't it very nice dude .... :)


Clean and Nice Organized of Futura Page Element

On the other hand, when you go to page element, You will not see any pictures in there. This page element is really private setting for you... It is clean and well organized as a framework of your blog. In the same time, The featured, Glide, and Slide section, is locked. Every widget that locked have the same color with the background. So that you can not remove or drag-drop. Why?? Just because They are the special widgets of Zinmag Futura.

You could change the setting, but we are not recommend it, only if you know about HTML code. I bet you know better than me... :) how much.... 20 bucks...100 bucks... heheheh just kidding about the bet. I don't like gambling either... it is forbidden in my believe... :)

This template has been tested in following browser :
1. Mozilla 2.xx (running well, no overflow, but the slide link is not shown)
2. mozilla 3.0x (perfect)
3. Internet Explorer 6 (running well, no overflow, but png image not shown)
4. Opera 9.0 (find)
That old browser is only tested tools. New Versions of it will show better.


Let's see the demo, from your computer, right guys.... !!! :D


Customizing Featured Widget (MANUALLY)


Oh.... well... now we are here.... Customizing Every Featured in Futura.

The Blogger Template Zinmag Futura is different from its versions in WP Theme. In WP themes, you can set all features into control panel by “semi-automatically”. But, in here, blogger, Zinmag Futura have to set manually.

Now I would like to explain how to customize the featured.

Customizing Menu
0. Go to Layout -- Edit HTML
1. Find (Ctrl+F) this
  • SUB-TITLE-LINK-ADDRESS
  • GROUP-TITLE-LINK-ADDRESS
2. Change it with your own targeted link.
3. Then, you have to change the title that inline the link, you will see:
  • GROUP TITLE
  • SUB TITLE
  • FRONT TITLE
  • SUB FRONT
4. Change it with your own title

5. Save the template

Customizing TWITTER
1. Go to EDIT/HTML, click expand widget template
2. find (Ctrl+F) this word:
TWITTER-ID-TWITTER
3. change all that word with your ID
4. Save The Template

example:
<script src='http://twitter.com/javascripts/blogger.js' type='text/javascript'/>
<script src='http://twitter.com/statuses/user_timeline/cahayabiru.json?callback=twitterCallback2&amp;count=5' type='text/javascript'/>

After That, Go to Add Page Element Tab, then read the explanation below.

Customizing The Slide (below the menu) :
The content in slide widget have a structure. I will explain to you the structure of image slide , please read below :

<!-- *********** BEGIN OF PER CONTENT *********** -->
<div class="panel">
<img width="200" src="IMAGE-SOURCE-ADDRESS-HERE" height="120"/>
<h2><a href="YOUR-LINK-ADDRESS-HERE" title="Batman">TITLE LINK HERE</a></h2>
</div>
<!-- *********** END OF PER CONTENT *********** -->

change the word :
"YOUR-LINK-ADDRESS" with your own targeted link
"IMAGE-SOURCE-ADDRESS-HERE" with your own hosted image
"TITLE LINK HERE" with your own word. It will appear in the web
And Remember, the size of picture is 200px width and 120px height

If you want to add more slide, just copy-paste another one of the structure above, then edit image source address, title link, and link address.

In Futura, The structure have to like that.
You could change it, but we are not recommend it, only if you understand javascript that have set by Jinsona Design.

The example of slide (5 content) :

<!-- *********** BEGIN COPY *********** -->

<div class="panel">
<img width="200" src="http://web2feel.com/futura/wp-content/uploads/bats.jpg" height="120"/>
<h2><a href="http://futura-demo.blogspot.com/2009/02/dont-cry.html" title="Batman">Batman</a></h2>
</div>

<div class="panel">
<img width="200" src="http://web2feel.com/futura/wp-content/uploads/obama.jpg" height="120"/>
<h2><a href="http://futura-demo.blogspot.com/2009/02/dont-cry.html" title="Obama">Obama</a></h2>
</div>

<div class="panel">
<img width="200" src="http://web2feel.com/futura/wp-content/uploads/britney.jpg" height="120"/>
<h2><a href="http://futura-demo.blogspot.com/2009/02/dont-cry.html" title="Test postin paragraphs and words">Test postin paragraphs and words</a></h2>
</div>

<div class="panel">
<img width="200" src="http://web2feel.com/futura/wp-content/uploads/pitts.jpg" height="120"/>
<h2><a href="http://futura-demo.blogspot.com/2009/02/dont-cry.html" title="Post with links">Post with links</a></h2>

</div>

<div class="panel">
<img width="200" src="http://web2feel.com/futura/wp-content/uploads/shooter.jpg" height="120"/>
<h2><a href="http://futura-demo.blogspot.com/2009/02/dont-cry.html" title="An ordered list">An ordered list</a></h2>
</div>

<!-- *********** END OF COPY *********** -->


Customizing The Featured Post :

The featured post is a place that make your reader know about your featured post. In this Zinmag Futura, The featured post is recommended only for one content.

The Structured of content in featured post widget :

<!-- *********** BEGIN OF PER CONTENT *********** -->

<span class="cat"> Posted under <a href="YOUR-LABEL-LINK-ADDRESS" title="View all posts in Featured" rel="category">LABEL-TITLE</a> </span>
<h2><a href="YOUR-TARGETED-LINK-HERE" title="Batman is back">TITLE-HERE</a></h2>

<div class="fentry">

<p> <a href="YOUR-IMAGE-LINK"><img class="alignnone size-full wp-image-28" title="batmans" src="http://web2feel.com/demo5/wp-content/uploads/batmans.jpg" alt="" width="240" height="150" /></a> TEASER-TEXT-OR-SHORT-PARAGRAPH ---- HERE
</p>

<div class="featmeta"> <a href="YOUR-TARGETED-LINK-HERE">Read More</div>

<!-- *********** END OF PER CONTENT *********** -->

Change all word :
  • YOUR-LABEL-LINK-ADDRESS with your label address of article
  • YOUR-IMAGE-LINK with your own image hosted link
  • TEASER-TEXT-OR-SHORT-PARAGRAPH with your own article text
  • YOUR-TARGETED-LINK with your post article that related with teaser text.

The Example Content of Featured Widget :

<span class="cat"> Posted under <a href="http://web2feel.com/demo5/?cat=8" title="View all posts in Featured" rel="category">Featured</a> </span>
<h2><a href="http://web2feel.com/demo5/?p=19" title="Batman is back">Batman is back</a></h2>

<div class="fentry">

<p> <img class="alignnone size-full wp-image-28" title="batmans" src="http://web2feel.com/demo5/wp-content/uploads/batmans.jpg" alt="" width="240" height="150" /> Lorem ipsum dolor sit amet, consectetuer adipiscing elit. Quisque sed felis. Aliquam sit amet felis. Mauris semper, velit semper laoreet dictum, quam diam dictum urna, nec placerat elit nisl in quam. Etiam augue pede, molestie eget, rhoncus at, convallis ut, eros. Aliquam pharetra. Nulla in tellus eget odio sagittis blandit. Maecenas at nisl. Nullam lorem mi, eleifend a, fringilla vel, semper at, ligula. Mauris eu wisi. Ut ante dui, aliquet nec, congue non, accumsan sit amet, lectus. Mauris et mauris. Duis sed massa id mauris pretium venenatis. Suspendisse cursus velit vel ligula. Mauris elit. Donec neque. Phasellus nec sapien quis pede facilisis suscipit. Aenean quis risus sit amet eros volutpat ullamcorper. Ut a mi. Etiam nulla. Mauris interdum.</p>

<div class="featmeta"> <a href="http://web2feel.com/demo5/?p=19">Read More</div>

Customizing The Glide in Futura
The Futura Glide is a featured above main post area that have up-down toggler. When you click the toggler, the content will change up and down.

The Structure Of Per Content Of Futura Glide :

<div class="glidecontent">
<span class="cats"> <a href="YOUR-LINK-ADDRESS-HERE" rel="category" title="View all posts in Featured">TITLE-HERE</a>, <a href="LABEL-LINK ADDRESS-HERE" rel="category" title="View all posts in Uncategorized">CATEGORIES OR LABEL HERE</a> </span>
<h2><a href="YOUR-TARGETED-LINK-HERE" title="Batman">TITLE HERE</a></h2>
<div class="hentry">
<img width="200" src="IMAGE-ADDRESS-HERE" height="120"/>
<p>TEASER TEXT OR SHORT PARAGRAPH HERE [...]</p>
</div>
</div>


Example Content Of Glide in Futura (3 content) :


<!-- *********** Begin Copy *********** -->
<div class="glidecontent">
<span class="cats"> <a href="http://web2feel.com/futura/?cat=8" rel="category" title="View all posts in Featured">Featured</a>, <a href="http://web2feel.com/futura/?cat=1" rel="category" title="View all posts in Uncategorized">Uncategorized</a> </span>
<h2><a href="http://web2feel.com/futura/?p=42" title="Batman">Batman</a></h2>
<div class="hentry">
<img width="200" src="http://web2feel.com/futura/wp-content/uploads/bats.jpg" height="120"/>
<p>Lorem ipsum dolor sit amet, consectetuer adipiscing elit. Quisque sed felis. Aliquam sit amet felis. Mauris semper, velit semper laoreet dictum, quam diam dictum urna, nec placerat elit nisl in quam. Etiam augue pede, molestie eget, rhoncus at, convallis ut, eros. Aliquam pharetra. Nulla in tellus eget odio sagittis blandit. Maecenas at nisl. Nullam lorem [...]</p>
</div>
</div>

<div class="glidecontent">
<span class="cats"> <a href="http://web2feel.com/futura/?cat=8" rel="category" title="View all posts in Featured">Featured</a>, <a href="http://web2feel.com/futura/?cat=1" rel="category" title="View all posts in Uncategorized">Uncategorized</a> </span>
<h2><a href="http://web2feel.com/futura/?p=42" title="Batman">Batman</a></h2>
<div class="hentry">
<img width="200" src="http://web2feel.com/futura/wp-content/uploads/bats.jpg" height="120"/>
<p>Lorem ipsum dolor sit amet, consectetuer adipiscing elit. Quisque sed felis. Aliquam sit amet felis. Mauris semper, velit semper laoreet dictum, quam diam dictum urna, nec placerat elit nisl in quam. Etiam augue pede, molestie eget, rhoncus at, convallis ut, eros. Aliquam pharetra. Nulla in tellus eget odio sagittis blandit. Maecenas at nisl. Nullam lorem [...]</p>
</div>
</div>

<div class="glidecontent">
<span class="cats"> <a href="http://web2feel.com/futura/?cat=8" rel="category" title="View all posts in Featured">Featured</a>, <a href="http://web2feel.com/futura/?cat=1" rel="category" title="View all posts in Uncategorized">Uncategorized</a> </span>
<h2><a href="http://web2feel.com/futura/?p=42" title="Batman">Batman</a></h2>
<div class="hentry">
<img width="200" src="http://web2feel.com/futura/wp-content/uploads/bats.jpg" height="120"/>
<p>Lorem ipsum dolor sit amet, consectetuer adipiscing elit. Quisque sed felis. Aliquam sit amet felis. Mauris semper, velit semper laoreet dictum, quam diam dictum urna, nec placerat elit nisl in quam. Etiam augue pede, molestie eget, rhoncus at, convallis ut, eros. Aliquam pharetra. Nulla in tellus eget odio sagittis blandit. Maecenas at nisl. Nullam lorem [...]</p>
</div>
</div>

<!-- *********** END OF COPY *********** -->


PLEASE DO NOT REMOVE THE FOOTER CREDIT...
Creative Commons License
Zinmag Futura Blogger Template by Cahaya Biru is licensed under a Creative Commons Attribution 3.0 United States License.
Based on a work at cahayabiru-sphere.blogspot.com.
Permissions beyond the scope of this license may be available at http://www.cahayabiru.com/2009/02/blogger-template-zinmag-futura.html.


that's all guys... Any question or comments, leave in comments box below.... If you like my work and want to help me increase this blog .. . you could press donate button .... :) :) ...

ENJOY THE FUTURA ........ :)

Zinmag Redux


The full versions of redux (based on the WP THEME) maybe is to complicated for some blogger, and they don't want to used it. Set these, set those, ohhh.... boring.... boring....:)

Based on that issue, I give you the Easy Versions of Redux. And I call it The Redux Version 2.

This Redux is Free.... no paypal account... or alike... However if you want to donate me, you can click donate button.... heheheheh.... hahahah :D


FOR SHORT

Just Upload the XML file.

Set The tabber
1. Go to Add page element
2. you will see 1 2 3
  • Number 1 is Feed Gadget; set the title, and fill in the form with your feeds address
example: http://YOUR-BLOG.blogspot.com/feeds/posts/default/
  • number 2 is HTML Gadget. Use it for your own purpose
  • Number 3 is Label.

Customizing The Menu
1. go to Edit HTML,
2. find (Ctrl+F) this
  • SUB-TITLE-LINK-ADDRESS
  • GROUP-TITLE-LINK-ADDRESS
3. change all that word with your targeted link address.
4. Then, change the SUB TITLE or GROUP TITLE which inline with your link .

THEN YOU ARE DONE ....

see yaaaa.........

Zinmag Redux (Full Featured)


Logo of Zinmag Redux


First time I saw Zinmag series is WP Zinmag Redux. I was impressed with its feature, inline minipost, Glide Content, and tabber :). I was newbie that time, maybe a baby blog...and I still didn't know how to convert WP Theme to Blogger Template. :). In that time, I was dreaming if there is anyone who can convert this WP Themes to Blogger Template. Now, I am not dreaming anymore. I convert it for you... :)

Enough for the story, now, I am going to launch Zinmag Redux to Blogger Template.

This Redux is Free.... no paypal account... or alike... However if you want to donate me, you could press the donate button in my sidebar...... :) heheheheh.... hahahah :D

The Feature Of Zinmag Redux Versions 1.0 :
1. Featured Content (Manually)
2. Glide Content (Manually)
3. Feed Icon on top
4. Menu
5. Inline Minipost (Magazine Style)
6. Tabber Tab (Locked)
7. Widget in Bottom (Locked)


CUSTOMIZING THE FEATURE OF REDUX


Set The tabber
1. Go to Add page element
2. you will see 1 2 3
  • Number 1 is Feed Gadget; set the title, and fill in the form with your feeds address
example: http://YOUR-BLOG.blogspot.com/feeds/posts/default/
  • number 2 is HTML Gadget. Use it for your own purpose
  • Number 3 is Label.

Customizing The Menu
1. go to Edit HTML,
2. find (Ctrl+F) this
  • FRONT-TITLE
  • SUB-FRONT-TITLE
  • SUB-TITLE-LINK-ADDRESS
  • GROUP-TITLE-LINK-ADDRESS
3. change all that word with your targeted link address.
4. Then, change the SUB TITLE or GROUP TITLE, that inline, with your own link .

Customizing Archive Widget
We recommend to set flat list, instead of hierarchy without post title include
example : January 2009 or Jan 2009


Customizing Featured Widget ( MANUALLY)


The Structured of content in featured widget :

<span class="cat"> Posted under <a href="http://YOUR-LABEL-LINK-ADDRESS" title="View all posts in Featured" rel="category">LABEL-TITLE</a> </span>
<h2><a href="YOUR-TARGETED-LINK-HERE" title="TITLE-HERE">TITLE-HERE</a></h2>

<div class="fentry">

<p> <a href="YOUR-IMAGE-LINK"><img class="alignnone size-full wp-image-28" title="batmans" src="http://web2feel.com/demo5/wp-content/uploads/batmans.jpg" alt="" width="240" height="150" /></a>
TEASER-TEXT-OR-SHORT-PARAGRAPH ---- HERE
</p>

<div class="featmeta"> <a href="YOUR-TARGETED-LINK-HERE">Read More</div>


The Example Content of Featured Widget :


<!-- ************ BEGIN COPY OF EXAMPLE FEATURED CONTENT *********** -->

<span class="cat"> Posted under <a href="http://web2feel.com/demo5/?cat=8" title="View all posts in Featured" rel="category">Featured</a> </span>
<h2><a href="" title="Batman is back">Batman is back</a></h2>

<div class="fentry">


<p> <img class="alignnone size-full wp-image-28" title="batmans" src="http://web2feel.com/demo5/wp-content/uploads/batmans.jpg" alt="" width="240" height="150" /> Lorem ipsum dolor sit amet, consectetuer adipiscing elit. Quisque sed felis. Aliquam sit amet felis. Mauris semper, velit semper laoreet dictum, quam diam dictum urna, nec placerat elit nisl in quam. Etiam augue pede, molestie eget, rhoncus at, convallis ut, eros. Aliquam pharetra. Nulla in tellus eget odio sagittis blandit. Maecenas at nisl. Nullam lorem mi, eleifend a, fringilla vel, semper at, ligula. Mauris eu wisi. Ut ante dui, aliquet nec, congue non, accumsan sit amet, lectus. Mauris et mauris. Duis sed massa id mauris pretium venenatis. Suspendisse cursus velit vel ligula. Mauris elit. Donec neque. Phasellus nec sapien quis pede facilisis suscipit. Aenean quis risus sit amet eros volutpat ullamcorper. Ut a mi. Etiam nulla. Mauris interdum.</p>

<div class="featmeta"> <a href="">Read More</div>

<!-- ************ END COPY OF EXAMPLE *********** -->


Customizing Glide Content

The structure per content of HTML in Redux is shown below:

<!-- ************ PER CONTENT START *********** -->

<div class="glidecontent">

<h2><a href="Change-with-your-targeted-link" title="title-here">text that show in web</a></h2>
<span class="cats"> Posted under <a href="http://YOUR-BLOG-ADDRESS-HERE.blogspot.com/search/label/TITLE-OF-YOUR-LABEL" rel="category" title="title-here">Label-SHOWN-IN-WEB</a> </span>

<div class="hentry">


<img width="200" src="YOUR-IMAGE-ADDRESS-HERE" height="120"/>

<p>TEASER-TEXT-HERE- MAYBE-SHORT-PARAGRAPH-OR-SHORT-SUMMARY[...]</p>

</div>

</div>

<!-- *********** END OF PER CONTENT *********** -->


If you in hurry, you could copy this code below, then paste into the Glider HTML Javascript in your page element


<!-- *********** start copy ************** -->

<div class="glidecontent">

<h2><a href="http://redux-demo.blogspot.com/2009/02/another-test-2.html" title="iPhone Apps">iPhone Apps</a></h2>
<span class="cats"> Posted under <a href="http://redux-demo.blogspot.com/search/label/test%20for%20you" rel="category" title="View all posts in Downloads">Downloads</a> </span>

<div class="hentry">

<img width="200" src="http://web2feel.com/demo5/wp-content/uploads/iphone.jpg" height="120"/>

<p>Lorem ipsum dolor sit amet, consectetuer adipiscing elit. Quisque sed felis. Aliquam sit amet felis. Mauris semper, velit semper laoreet dictum, quam diam dictum urna, nec placerat elit nisl in quam. Etiam augue pede, molestie eget, rhoncus at, convallis ut, eros. Aliquam pharetra. Nulla in tellus eget odio sagittis blandit. Maecenas at nisl. Nullam lorem [...]</p>
</div>


</div>

<div class="glidecontent">

<h2><a href="http://redux-demo.blogspot.com/2009/02/another-test-2.html" title="Britney is back">Britney is back</a></h2>
<span class="cats"> Posted under <a href="http://redux-demo.blogspot.com/search/label/test%20for%20you" rel="category" title="View all posts in music">music</a> </span>
<div class="hentry">
<img width="200" src="http://web2feel.com/demo5/wp-content/uploads/britney.jpg" height="120"/>
<p>Lorem ipsum dolor sit amet, consectetuer adipiscing elit. Quisque sed felis. Aliquam sit amet felis. Mauris semper, velit semper laoreet dictum, quam diam dictum urna, nec placerat elit nisl in quam. Etiam augue pede, molestie eget, rhoncus at, convallis ut, eros. Aliquam pharetra. Nulla in tellus eget odio sagittis blandit. Maecenas at nisl. Nullam lorem [...]</p>
</div>
</div>


<div class="glidecontent">
<h2><a href="http://redux-demo.blogspot.com/2009/02/another-test-2.html" title="Financial crunch effect on US politics">Financial crunch effect on US politics</a></h2>
<span class="cats"> Posted under <a href="http://redux-demo.blogspot.com/search/label/test%20for%20you" rel="category" title="View all posts in politics">politics</a> </span>
<div class="hentry">
<img width="200" src="http://web2feel.com/demo5/wp-content/uploads/obama1.jpg" height="120"/>
<p>Lorem ipsum dolor sit amet, consectetuer adipiscing elit. Quisque sed felis. Aliquam sit amet felis. Mauris semper, velit semper laoreet dictum, quam diam dictum urna, nec placerat elit nisl in quam. Etiam augue pede, molestie eget, rhoncus at, convallis ut, eros. Aliquam pharetra. Nulla in tellus eget odio sagittis blandit. Maecenas at nisl. Nullam lorem [...]</p>
</div>
</div>

<div class="glidecontent">
<h2><a href="http://redux-demo.blogspot.com/2009/02/another-test-2.html" title="Batman is back">Batman is back</a></h2>
<span class="cats"> Posted under <a href="http://web2feel.com/demo5/?cat=8" rel="category" title="View all posts in Featured">Featured</a> </span>
<div class="hentry">
<img width="200" src="http://web2feel.com/demo5/wp-content/uploads/bats.jpg" height="120"/>
<p>Lorem ipsum dolor sit amet, consectetuer adipiscing elit. Quisque sed felis. Aliquam sit amet felis. Mauris semper, velit semper laoreet dictum, quam diam dictum urna, nec placerat elit nisl in quam. Etiam augue pede, molestie eget, rhoncus at, convallis ut, eros. Aliquam pharetra. Nulla in tellus eget odio sagittis blandit. Maecenas [...]</p>
</div>
</div>

<div class="glidecontent">
<h2><a href="http://redux-demo.blogspot.com/2009/02/another-test-2.html" title="Action Games">Action Games</a></h2>
<span class="cats"> Posted under <a href="http://redux-demo.blogspot.com/search/label/test%20for%20you" rel="category" title="View all posts in Childcare">Childcare</a>, <a href="http://redux-demo.blogspot.com/search/label/test%20for%20you" rel="category" title="View all posts in Downloads">Downloads</a>, <a href="http://redux-demo.blogspot.com/search/label/test%20for%20you" rel="category" title="View all posts in Dvd">Dvd</a>, <a href="http://redux-demo.blogspot.com/search/label/test%20for%20you" rel="category" title="View all posts in Games">Games</a>, <a href="http://redux-demo.blogspot.com/search/label/test%20for%20you" rel="category" title="View all posts in Software">Software</a> </span>

<div class="hentry">
<img width="200" src="http://web2feel.com/demo5/wp-content/uploads/batista.jpg" height="120"/>
<p>Lorem ipsum dolor sit amet, consectetuer adipiscing elit. Quisque sed felis. Aliquam sit amet felis. Mauris semper, velit semper laoreet dictum, quam diam dictum urna, nec placerat elit nisl in quam. Etiam augue pede, molestie eget, rhoncus at, convallis ut, eros. Aliquam pharetra. Nulla in tellus eget odio sagittis blandit. Maecenas at nisl. Nullam lorem [...]</p>
</div>
</div>

<div class="glidecontent">
<h2><a href="http://redux-demo.blogspot.com/2009/02/another-test-2.html" title="Post with links">Post with links</a></h2>
<span class="cats"> Posted under <a href="http://redux-demo.blogspot.com/search/label/test%20for%20you" rel="category" title="View all posts in Featured">Featured</a>, <a href="http://web2feel.com/demo5/?cat=19" rel="category" title="View all posts in Uncategory">Uncategory</a> </span>
<div class="hentry">
<img width="200" src="http://web2feel.com/demo5/wp-content/uploads/music.jpg" height="120"/>
<p>This is the web2feel wordpress theme demo site. You have come here from our home page.<br/>
Explore the Theme preview and inorder to RETURN to the web2feel home page CLICK HERE</p>
</div>
</div>

<!-- *********** End of the example *********** -->


AFTER REDUX, THERE WILL BE FUTURA AND MONEZINE ........

Zinmag Primus V. 1.1


In this post, I am not launching new WP themes converted to Blogger Templates. But, I want to continue Zinmag Primus versions 1.0 to versions 1.1, and providing little difference between them.

Actually the Versions 1.0 of zinmag primus is not converted by me, but Falcon did.
I have modified some the code of it, than I called Versions 1.1.

What is the difference between Versions 1.0 and 1.1 ? The difference is about the slider.
  • First; When you use versions 1.0, the slider is not hidden in the back or post-page. So you can see it either in home and back page. In Versions 1.1, it is only seen at the home page or archive/label page, but not in the post page.
  • Second; is about the code of section. Versions 1.0 uses 3 (three) section for 3 content. But, In Versions 1.1, it is only use 1 section and could load more than 3 (three) content.
That's all... :).
(I don't want you get bored read my writing.... :))

Thank to Falcon Hive for being nice converting Versions 1.0 for free....

Preview Demo Of Blogger Template Zinmag Primus

Version 1.0 Or Version 1.1

Download BT Zinmag Primus Versions 1.1


Customizing The Content Of the Slider in In Blogger Templates (BT) ZINMAG PRIMUS Versions 1.1
1. Go to your Page Element, you will see Slider, then press edit
2. You have to read the structure below before fill in the content of the slider
3. If you are in hurry, copy paste the example code below the structure into the box of the slider

The Structure Of per content Of Slider in Primus is shown below :


<div class="slide">
<h2><a href="your-targeted-link-here" title="title-of-your-targeted-link-here">Text-will-show-in-web-here</a></h2>
<span class="slmet">Posted By ...... On ...... </span>
<p> Teaser Text Here ......................... </p>
<img src="YOUR-IMAGE-LINK-ADDRESS-HERE" width="250" height="120"/> </a>
</div>


a. change your-targeted-link-here with your link
b. change title-of-your-targeted-link-here with your own title
c. Change text-will-show-in-web with your own title
d. fill in the blank dot (...) with your name or the author's
e. fill in the second blank dot (...) with Date
f. Change TEASER-TEXT-HERE with your own teaser text. It could be sentence and short paragraph.
g. change YOUR IMAGE-LINK-ADDRESS-HERE with your own

Example Code of The Slider : Copy this code below


<!-- begin copy -->

<div class="slide">
<h2><a href="http://cahayabiru-sphere.blogspot.com" title="Superbowl">Superbowl</a></h2>
<span class="slmet"> Posted by jinsona On December - 1 - 2008 </span>
<p>Lorem ipsum dolor sit amet, consectetuer adipiscing elit. Quisque sed felis. Aliquam sit amet felis. Mauris semper, velit semper laoreet dictum, quam diam dictum urna, nec placerat elit nisl in quam. Etiam augue pede, molestie eget, rhoncus at, convallis ut, eros. Aliquam pharetra. Nulla in tellus eget odio sagittis blandit. Maecenas at nisl. Nullam lorem mi, eleifend a, fringilla vel, semper at, ligula. Mauris eu wisi. Ut ante dui, aliquet nec, congue non, accumsan sit amet, lectus. Mauris et mauris. ...</p>

<img alt="" src="http://web2feel.com/monezine/wp-content/themes/primus/timthumb.php?src=http://web2feel.com/monezine/wp-content/uploads/2008/12/stad.jpg&amp;h=120&amp;w=250&amp;zc=1"/>
</div>
<div class="slide">
<h2><a href="http://cahayabiru-sphere.blogspot.com" title="Bond with a vengeance">Bond with a vengeance</a></h2>
<span class="slmet"> Posted by jinsona On December - 1 - 2008 </span>
<p>Lorem ipsum dolor sit amet, consectetuer adipiscing elit. Quisque sed felis. Aliquam sit amet felis. Mauris semper, velit semper laoreet dictum, quam diam dictum urna, nec placerat elit nisl in quam. Etiam augue pede, molestie eget, rhoncus at, convallis ut, eros. Aliquam pharetra. Nulla in tellus eget odio sagittis blandit. Maecenas at nisl. Nullam lorem mi, eleifend a, fringilla vel, semper at, ligula. Mauris eu wisi. Ut ante dui, aliquet nec, congue non, accumsan sit amet, lectus. Mauris et mauris. ...</p>

<img alt="" src="http://web2feel.com/monezine/wp-content/themes/primus/timthumb.php?src=http://web2feel.com/monezine/wp-content/uploads/2008/12/bond.jpg&amp;h=120&amp;w=250&amp;zc=1"/>

</div>

<!-- end of copy -->


Customizing Twitter
1. Go to your Layout tab --> Edit HTML
2. Find (Ctrl+F) this: twitter-name-here
3. change all that word with your TWITTER ID
4. Save the change

example:


<script src='http://twitter.com/statuses/user_timeline/cahayabiru.json?callback=twitterCallback2&amp;count=5' type='text/javascript'/>


Ads 125 x 125 px
1. Go to Tab Edit HTML
2. find (CTRL+F) this your-targeted-link.
change the word your-targeted-link with your own link
3. in line with it, you will read your-image-link.
change YOUR-IMAGE-LINK with your own image link address
4. Save the change

Customizing VIDEO 310px X 219px
1. Go to youtube.com or any web alike
2. find any video that you like
3. Copy the code
4. change the setting of Width, 310px, and Height, 219px
5. Go to your Page Element
6. Paste the code into the HTML Gadget in your page element

Customizing Tag Cloud
1. Go to http://www.tagcloud-generator.com/
2. choose manually, then fill the blank form with your link categories
3. After finish, copy the script or code that given
4. go to your Page Element, then Paste the code into Tags Cloud HTML Gadget in right column

That's all. Any questions, leave a comments below...
Thanks for visiting my blog ............ :) :)


GameZine V 1. 0

THIS ARTICLE HAVE BEEN UPDATED IN ANOTHER PAGE...
THE GAMEZINE TEMPLATE HAVE RELEASED FOR FREE


Wordpress Theme Zinmag Gamezine is awesome. Now, available in BLOGGER.
We have converted the Zinmag GameZine WP Theme for you to buy.

The Feature of Zinmag Gamezine is:
  1. Magazine Style
  2. Glider Content
  3. Slider
  4. TabDiv for ads 125x125 px
  5. Video with GameZine TV Header
  6. Search form
  7. Menu on top and below header
  8. featlist content
This template has been tested in :
  • Mozilla Firefox 3.0x
  • Internet Explorer 6 (New Versions will view it better, like IE 7 or 8)

Preview Demo | No Download Link
(pay/send me $8 to my paypal account, then I will send the package to your e-mail)
(I think this is not too much)

The package contain:
  1. xml file with image and javascript hosted
  2. xml file without image and javascript hosted
  3. Installation Guide
  4. example code and explanation about how customizing some feature in the Gamezine (word document)
  5. Read Me text file
The reason that I have to sell this Blogger Template is that I have planned to save money to buy laptop. Beside, There's only one computer in my house and it is my big brother's PC's for his kids.
the plan = 8 x 125 = $1000 = laptop,

when there's 125 blogger buy my work in this blog, the number is reach. When it reach, I promise that I will report transparently to you...

Then, every great template in this blog, in the future, is all free..............

Forex Press

If I see green color, my mind directly connect with nature, tree and leaf. :). But this green is difference. it is related with money. hahahah...
In my country, money is not only in green but also in red, blue, and brown.
Again, hahahah.... Green is just metaphor right....!! just kidding men, just kidding....:).

By the way, as new comer, I would like to Introduce Forex Press V. 1.0 Blogger Template that I have converted from Word Press for you.


This template has been tested in :
  1. Internet Explorer 6. (new versions will view it best, like IE 8)
  2. Mozilla Firefox 2.xx (new versions will view it best, like Firefox 3.xx)
  3. Opera 9.0 (new versions will view best)
After Downloading, please leave a comment below..... yeah... ...........:)

FOREX PRESS GUIDE :
1. Customizing the FeedBurner Form
  • Go to LAYOUT -- Edit HTML -- No need to expand widget
  • find (CTRL+F) this word :

YOUR-FEEDBURNER-ID


Change it with your own ID. For Example: CahayaBirusSphere

2. Customizing the Menu

Here is the HTML Structure of per menu.
<li><a href='POST-LINK-LOCATION' title='POST-TITLE'> POST-TITLE </a></li>

You can add more menu link by copy-paste under the previous one.
Also, You can edit it in wordprocessor or notepad.

Change the words
  • POST-LINK-LOCATION with your own link
  • POST-TITLE with your own title. The first POST TITLE is hover text. It will show when your mouse put over the link. The second is Text title which can be shown in web.

After that editing, ,
  • Go to LAYOUT -- Add Page Element
  • you will see FOX MENU
  • Press edit
  • Then fill it with yours which just have been edited...
  • Save your template.

For the rest instructions, you can read it in the package.


The files is UPDATED IN 10 April 2009


PLEASE DO NOT REMOVE THE FOOTER CREDIT


Creative Commons License
Forex Press by Cahaya Biru is licensed under a Creative Commons Attribution 3.0 United States License.
Based on a work at cahayabiru-sphere.blogspot.com.
Permissions beyond the scope of this license may be available at http://www.cahayabiru.com/2009/01/blogger-template-forex-press.html.

Blog Archive

Free Blogger Template Cahaya Biru

Followers

Search This Blog