Creative Press

Creative Press

Creative Press
Creativepress is a xml with a business template layout and blog layout mixed together. The theme is very apt for your small business websites . This will let you break away from the conventional blog format sites using Blogger Templates


Customize The Logo


Go to Layout – Edit HTML – no need to expand widget template
Find this image address :

https://blogger.googleusercontent.com/img/b/R29vZ2xl/AVvXsEhpLkn39htaqUI1LrCzNmezFXt6jVWkYu6FOW2owOmuCfr7-OKvGbXJQeorwyD51vvDKgAeK_CFM68mmFO-X_p8BGUu35yDTwZZyw9cEUNcLURiuE1lFkHcCuVY-CJ-JJWi0y9gDFxVeg/s400/logo.png

The PSD file of the logo have been attached in download package. Please make customization in your image editor. Upload into webhosting and get the link address.
After that, change it with your own image address that you have been uploaded in webhosting.


Change the Welcoming Sentence


  • Go to LAYOUT HTML
  • then you see a text widget "welcome to my site"
  • press edit then change and fill it with whatever words, up to you ...


SET UP TWITTER
Watch out, There are two place to be changed.OK. After that, change that texts with your Twitter ID

For the first
Go to Edit HTML, then please find this text:


http://twitter.com/twitter

Please change the second twitter text (in red color) with your Twitter ID. For Example:
http://twitter.com/cahayabiru

After that, find this code:

http://twitter.com/statuses/user_timeline/twitter.json

please replace the second twitter text (in red color) with your ID. example
http://twitter.com/statuses/user_timeline/cahayabiru.json

Save your template


Customize The Menu


Go to Layout -- Edit HTML tab
No need to check Expand widget template
Find (Ctrl+F) this below:

<li><a href='#'>Title Here</a></li>

Then, You will find like this:

<li><a href='#'>Title Here</a></li>

Please, change # symbol with your targeted address.
Change the word Title Here with your own title.
You can edit this in Notepad or wordprocessor.
After all finish, then save your template.

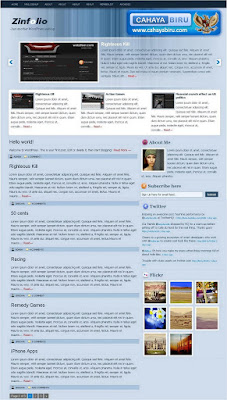
Zin Folio Full Versions

Zin Folio Professional

Zin Folio Professional
Zin Folio is three column template with special feature included. Zin Folio is a magazine style which equipped with Image and Text Slider, Feedburner Form, Menu Bar, and Inline Small News . Try the Zin Folio for your blog, and you will get new blogging experience with it.


Customize The Logo


Go to Layout – Edit HTML – no need to expand widget template
Find this image address :

https://blogger.googleusercontent.com/img/b/R29vZ2xl/AVvXsEhzLy3V3LnxY5TZohzzUEfSI3uCqfAKSl6K82QYQF2-UcF3w3sX7rPidln2x6CIYbXOGDdSHrFSLhZ2Rw1NEz_6lo3sHm2N0pFRFP9iJmQD9GrinCYPkRDTiaZuQ72cRxKgop2SWVv1ow/s400/logo.png

The PSD file of the logo have been attached in download package. Please make customization in your image editor. Upload into webhosting and get the link address.
After that, change it with your own image address that you have been uploaded in webhosting.


Set The Feed Burner ID Form


Go to Layout – Edit HTML – no need to expand widget template
Find This Word:
CahayaBirusSphere

After that Change it with your own Feedburner ID.


Customize The Menu


Go to Layout -- Edit HTML tab
No need to check Expand widget template
Find (Ctrl+F) this below:

<li><a href='#'>Title Here</a></li>

Then, You will find like this:

<li><a href='#'>Title Here</a></li>

Please, change # symbol with your targeted address.
Change the word Title Here with your own title.
You can edit this in Notepad or wordprocessor.
After all finish, then save your template.


Install The Javascript


Upload the Javascript (JS) file in JS foloder in webhosting. After that, please find this :
JAVASCRIPT-HOSTING-LINK-LOCATION

There are three scripts, change it with the location of your webhosting.

Example:


<script src="JAVASCRIPT-HOSTING-LINK-LOCATION/slider.js" type="text/javascript"/>

with this

<script src="http://fileave.com/cahayabiru/slider.js" type="text/javascript"/>

If your JS feature does not work, please recheck the JS address.


Customize the Special Features Of the Template


Small News

This writing explains about how to fill in the content of SMALL NEWS gadget in Zin Folio Template

Short Info


Small News is a feature to place some interesting news that you have been featured. SMALL NEWS has been set with inline display so that it could be fit to the entire width of the template. There are three content in SMALL NEWS feature. Please, see the screenshot below.


HTML Structure

Every content in SMALL NEWS is using HTML combination. Below is the HTML of one content in small news gadget.
<div class="blurb">
<img src="IMAGE100x70" alt=""/>
<h2><a href="ARTICLE-LINK" title="HOVER-TITLE"> ARTICLE-TITLE </a></h2>
<p>TEASER TEXT ... <a href=” ARTICLE-LINK”>Read→</a></p>
</div>

  • IMAGE-ADDRESS with the address of your image. The image size is 100px width and 70px height
  • ARTICLE-LINK with the link of your blog article. Try to find the most interesting information or news, and it will be a good content for the slider content.
  • ARTICLE-TITLE with the title of your blog article.
  • TEASER-TEXT with some texts, maybe about 20 words as a teaser for your reader. Or, you could copy-paste some paragraph from your article.
You can edit those HTML in notepad or word processor
To make another content, please copy-paste another one before or after the previous content.


After make customization, please read this:
  • Go to LAYOUT – Page element
  • In that page you will see Slider gadget, please press edit button
  • Copy-paste your customization into the box
  • Save it


Customize the Special Features Of the Template


Inline Small News

Image and Text Slider

This writing explains about how to fill the content of Slider Gadget

Short Description


Slider with Teaser Text is a link with thumbnails picture and short text as teaser. The Image and texts can automatically move to left or right. In the same time, it could manually slide by pressing the left-right panel button. Slider could attract your blog visitors to read your article which you’ve been featured.
Please, see the screenshot below.


HTML Structure


Every content in Slider Gadget is using HTML combination. Below is the HTML of one content in slider gadget.

<div class="panel">
<img src="IMAGE-ADDRESS" alt=""/>
<div class="inpost">
<h2><a href="ARTICLE-LINK" title="TITLE">ARTICLE-TITLE</a></h2>
<p>TEASER TEXT HERE.... <a href='ARTICLE-LINK'>Read→</a></p>
</div>
</div>

Please changethe words
  • IMAGE-ADDRESS with the address of your image. The image size is 360 width and 180 height.
  • ARTICLE-LINK with the link of your blog article. Try to find the most interesting information or news, and it will be a good content for the slider content.
  • ARTICLE-TITLE with the title of your blog article.
  • TEASER-TEXT with some texts, maybe about 20 – 50 words as a teaser for your reader. Or, you could copy-paste some paragraph from your article.
You can edit those HTML in notepad or word processor
To make another content, please copy-paste another one before or after the previous content.

After make customization, please read this:
  • Go to LAYOUT – Page element
  • In that page you will see Slider gadget, please press edit button
  • Copy-paste your customization into the box
  • Save it


Customize the Special Features Of the Template


Image And Texts Slider

Zin Folio

Zin Folio

Zin Folio
Zin Folio is three column template with special feature included. Zin Folio is a magazine style, light blue. Try the Zin Folio for your blog, and you will get new blogging experience with it.
If you like my post or article, please subscribe to my email feedburner form in my right sidebar. OK. Have a nice Blogging.


Customize The Logo


Go to Layout – Edit HTML – no need to expand widget template
Find this image address :

https://blogger.googleusercontent.com/img/b/R29vZ2xl/AVvXsEhzLy3V3LnxY5TZohzzUEfSI3uCqfAKSl6K82QYQF2-UcF3w3sX7rPidln2x6CIYbXOGDdSHrFSLhZ2Rw1NEz_6lo3sHm2N0pFRFP9iJmQD9GrinCYPkRDTiaZuQ72cRxKgop2SWVv1ow/s400/logo.png

The PSD file of the logo have been attached in download package. Please make customization in your image editor. Upload into webhosting and get the link address.
After that, change it with your own image address that you have been uploaded in webhosting.


Set The Feed Burner ID Form


Go to Layout – Edit HTML – no need to expand widget template
Find This Word:
CahayaBirusSphere

After that Change it with your own Feedburner ID.


Customize The Menu


Go to Layout -- Edit HTML tab
No need to check Expand widget template
Find (Ctrl+F) this below:

<li><a href='#'>Title Here</a></li>

Then, You will find like this:

<li><a href='#'>Title Here</a></li>

Please, change # symbol with your targeted address.
Change the word Title Here with your own title.
You can edit this in Notepad or wordprocessor.
After all finish, then save your template.

Blog Archive

Free Blogger Template Cahaya Biru

Followers

Search This Blog