WoodMag

Install The Template

  1. Please Sign In to Blogger
  2. Go to LAYOUT -- Edit HTML
  3. If You need to back up your old templates, please do the back up first.
  4. Upload The XML Files.
  5. Click the Upload button.
  6. Save your template.

Echi

Install The Template

  1. Please Sign In to Blogger
  2. Go to LAYOUT -- Edit HTML
  3. If You need to back up your old templates, please do the back up first.
  4. Upload The XML Files.
  5. Click the Upload button.
  6. Save your template.

Grunged Girl

Install The Template

  1. Please Sign In to Blogger
  2. Go to LAYOUT -- Edit HTML
  3. If You need to back up your old templates, please do the back up first.
  4. Upload The XML Files.
  5. Click the Upload button.
  6. Save your template.

Cookiez

Install The Template

  1. Please Sign In to Blogger
  2. Go to LAYOUT -- Edit HTML
  3. If You need to back up your old templates, please do the back up first.
  4. Upload The XML Files.
  5. Click the Upload button.
  6. Save your template.

Amoebaneo

Install The Template

  1. Please Sign In to Blogger
  2. Go to LAYOUT -- Edit HTML
  3. If You need to back up your old templates, please do the back up first.
  4. Upload The XML Files.
  5. Click the Upload button.
  6. Save your template.

Gallery Templates

Install The Template

  1. Please Sign In to Blogger
  2. Go to LAYOUT -- Edit HTML
  3. If You need to back up your old templates, please do the back up first.
  4. Upload The XML Files.
  5. Click the Upload button.
  6. Save your template.

Template Clinic

Designed By Ariane
XML By TNB
DATE 14 June 2009

Install The Template

  1. Please Sign In to Blogger
  2. Go to LAYOUT -- Edit HTML
  3. If You need to back up your old templates, please do the back up first.
  4. Upload The XML Files.
  5. Click the Upload button.
  6. Save your template.

Template Astra

Designed By Ariane
XML By TNB
DATE 14 June 2009

Install The Template

  1. Please Sign In to Blogger
  2. Go to LAYOUT -- Edit HTML
  3. If You need to back up your old templates, please do the back up first.
  4. Upload The XML Files.
  5. Click the Upload button.
  6. Save your template.

Blogger Template For Girl

These Collection Will Update daily


Girly Magazine

Install The Template

  1. Please Sign In to Blogger
  2. Go to LAYOUT -- Edit HTML
  3. If You need to back up your old templates, please do the back up first.
  4. Upload The XML Files.
  5. Click the Upload button.
  6. Save your template.

Cosmetic Girl

Install The Template

  1. Please Sign In to Blogger
  2. Go to LAYOUT -- Edit HTML
  3. If You need to back up your old templates, please do the back up first.
  4. Upload The XML Files.
  5. Click the Upload button.
  6. Save your template.

Category Menu

Many users of my template asked about how to make Sub title or children link in My template conversion. This article will explain about how to make category link in my works. And, this is only capable for template that designed by Jinsona Design, (except Gamezine...). 

Before  start, let us imagine about simple classification logic. Please see the screenshot below.


Ok.... First picture tell us about covered area. The Red is the biggest, it cover the blue and green color area. While the blue is the second biggest. And so on.
While, The second picture is telling us about the structure. A is the biggest class. A1, A2, A3, A4 are the second class. A1a, A1b, and etc are the smallest.

To make the sublink, The principle is the same with the classification in the screenshot above. Yes, so simple, right.

Now, Let's begin.
Here is the HTML Structure of Sub-link or children.
<li><a href="PARENT-LINK-ADDRESS">PARENT TITLE</a>
<ul class="children">
<li><a href="CHILDREN-LINK-ADDRESS">CHILDREN TITLE</a></li>


<li><a href="SUB-PARENT-LINK-ADDRESS">SUB PARENT TITLE</a>
<ul class="children">
<li><a href="CHILDREN-LINK-ADDRESS">CHILDREN TITLE</a></li>


<!-- You could add more list by copy-paste the green text in here -->

</ul>

</li>

<!-- You could add more list by copy-paste in here -->

</ul>


<!-- You could add more list by copy-paste here -->

</li>


Note 1:
The red Color is the largest / biggest class
The Blue color is the second largest class
The Green Color is the smallest class

Note 2:
Change the word below with website address or URL
CHILDREN-LINK-ADDRESS
SUB-PARENT-LINK-ADDRESS
PARENT-LINK-ADDRESS

Also, Change the word below with your link title:
CHILDREN TITLE
SUB PARENT TITLE
PARENT TITLE


Blogger Tube

Install The Template

  1. Please Sign In to Blogger
  2. Go to LAYOUT -- Edit HTML
  3. If You need to back up your old templates, please do the back up first.
  4. Upload The XML Files.
  5. Click the Upload button.
  6. Save your template.

Feed Url

Some of my user have asked about how to get feed url. Feed url can be used for showing recent post and comments in our Blog.


Go to -- LAYOUT -- Add Page Element -- Add Gadget -- Choose Feed Gadget -- and you'll see Feed Url Form.

After you find the form, you need to fill it with Feed URL address.
Below is the structure :

For Recent Post
http://YOUR-BLOG-ADDRESS/feeds/posts/default

While For Recent Comments, simply change the word "post (in blue text)" with the word comments. Please see below:
http://YOUR-BLOG-ADDRESS/feeds/comments/default

That is it.

NB:
If you find that our post is useful, please subscribe to my feedburner form in right sidebar. I will deliver every new information in this blog to your mail inbox. 


Template Pin Up

Designed By Ariane
XML By TNB
DATE 4 September 2009

Install The Template

  1. Please Sign In to Blogger
  2. Go to LAYOUT -- Edit HTML
  3. If You need to back up your old templates, please do the back up first.
  4. Upload The XML Files.
  5. Click the Upload button.
  6. Save your template.

Beauty

Designed By Ariane
XML By TNB
DATE 14 June 2009

Install The Template

  1. Please Sign In to Blogger
  2. Go to LAYOUT -- Edit HTML
  3. If You need to back up your old templates, please do the back up first.
  4. Upload The XML Files.
  5. Click the Upload button.
  6. Save your template.

Futebol

Designed By Ariane
XML By TNB
DATE 14 September 2009

Install The Template

  1. Please Sign In to Blogger
  2. Go to LAYOUT -- Edit HTML
  3. If You need to back up your old templates, please do the back up first.
  4. Upload The XML Files.
  5. Click the Upload button.
  6. Save your template.

Grass Root

Install The Template

  1. Please Sign In to Blogger
  2. Go to LAYOUT -- Edit HTML
  3. If You need to back up your old templates, please do the back up first.
  4. Upload The XML Files.
  5. Click the Upload button.
  6. Save your template.

Iblog Blogger Template

Install The Template

  1. Please Sign In to Blogger
  2. Go to LAYOUT -- Edit HTML
  3. If You need to back up your old templates, please do the back up first.
  4. Upload The XML Files.
  5. Click the Upload button.
  6. Save your template.

Aerodome

Install The Template

  1. Please Sign In to Blogger
  2. Go to LAYOUT -- Edit HTML
  3. If You need to back up your old templates, please do the back up first.
  4. Upload The Scarlett XML Files.
  5. Click the Upload button.
  6. Save your template.

Scarlett 4 Columns

Scarlett

Forex Press

Scarlett 4 is Four column template. With dark and white color combination, Scarlett is ready for any niche. The template is hot, please try it for your next blogging.

If you like my works and articles, you could subscribe in my feed form in right sidebar of this site.

Ok, Have a nice blogging.... :)

Install The Template

  1. Please Sign In to Blogger
  2. Go to LAYOUT -- Edit HTML
  3. If You need to back up your old templates, please do the back up first.
  4. Upload The Scarlett XML Files.
  5. Click the Upload button.
  6. Save your template.

Customize The Logo


Go to Layout – Edit HTML – no need to expand widget template
Find this image address :

http://2.bp.blogspot.com/_xfdD6S9fOk4/SdlaB-KbXOI/AAAAAAAAAnc/M7XGhmhf-Ls/s1600/logo.jpg

The logo use image file. The size is 202 pixels width and 35 pixels height. Please make customization in image editor. After you make your own logo, Upload it into webhosting and get the link address.
After that, replace the above address with your own image address that you get in your webhosting.

Customize The Menu

The menu link use a simple HTML combination.
<li><a href='#'>Title Here</a></li>
Please, change # symbol with your targeted address.
Change the word Title Here with your own title.

You can edit this in Notepad or wordprocessor.
  • after edit it, please Go to Layout -- Add Page Element
  • You will find FOX MENU GADGET.
  • Press edit, after that, fill it with that HTML combination above.
  • Save it
You can add more link by copy paste another structure below or above the previous one.

For example:
<li><a href='#'>Title Here</a></li>

After all finish, then save.
The Second Menu
find this (Ctrl+F) :
<li><a href="PARENT-LINK-ADDRESS">PARENT TITLE</a></li>

below that code, you will find like this:

<li><a href='PARENT-LINK-ADDRESS'>PARENT TITLE</a></li>

Please, change PARENT-LINK-ADDRESS with your own targeted address.
After that, change the word PARENT-TITLE with your own title.
Save your template


125x125 Sponsor Banners

HTML Combination:
<li>
<a href="TARGET-LINK"><img style="vertical-align:bottom;" src="BANNER-125x125"/></a>
</li>

Please, change the words:
  • TARGET-LINK with your targeted web address
  • BANNER-125x125 with the address of your banner
That HTML above is for one image banner. You could edit that Combination in notepad or wordprocessor.

After editing,
  1. please go to LAYOUT -- add page element
  2. you'll see SPONSOR or Banner gadget
  3. press edit n paste your editing into it
  4. save it
To make another banner, in the gadget box, simply copy-paste below or above the previous content.

Customize Targeted Adsense 338 X 250

Go to Adsense.com, Use 338 X 250 Size, and please copy the code.
Convert your adsense code into entities.

Go to LAYOUT -- Edit HTML -- expand widget template
Find this code:
<div class="ad1">
<!-- Ad_code_section_starts -->

Below that codes, you'll see like this below:

<div class="ad1">
<!-- Ad_code_section_starts -->

<script type="text/javascript"><!--
google_ad_client = "pub-XXXXXXXXXXXXXX";
/* Scarlett Post Targeted */
google_ad_slot = "XXXXXXXXXX";
google_ad_width = 336;
google_ad_height = 280;
//-->
</script>
<script type="text/javascript"
src="http://pagead2.googlesyndication.com/pagead/show_ads.js">
</script>

<!-- Ad_code_section_ends -->
</div>

The blue text is my adsense code. Now, replace it with your code, the one that after converted.
After that, Save your template. Wait for 10-15, standard from Adsense, and your ads will show up...

Scarlett

Scarlett

Forex Press

Scarlett is three column template. With dark and white color combination, Scarlett is ready for any niche. The template is hot, please try it for your next blogging.

If you like my works and articles, you could subscribe in my feed form in right sidebar of this site.

Ok, Have a nice blogging.... :)

Install The Template

  1. Please Sign In to Blogger
  2. Go to LAYOUT -- Edit HTML
  3. If You need to back up your old templates, please do the back up first.
  4. Upload The Scarlett XML Files.
  5. Click the Upload button.
  6. Save your template.

Customize The Logo


Go to Layout – Edit HTML – no need to expand widget template
Find this image address :

http://2.bp.blogspot.com/_xfdD6S9fOk4/SdlaB-KbXOI/AAAAAAAAAnc/M7XGhmhf-Ls/s1600/logo.jpg

The logo use image file. The size is 202 pixels width and 35 pixels height. Please make customization in image editor. After you make your own logo, Upload it into webhosting and get the link address.
After that, replace the above address with your own image address that you get in your webhosting.

Customize The Menu

The menu link use a simple HTML combination.
<li><a href='#'>Title Here</a></li>
Please, change # symbol with your targeted address.
Change the word Title Here with your own title.

You can edit this in Notepad or wordprocessor.
  • after edit it, please Go to Layout -- Add Page Element
  • You will find FOX MENU GADGET.
  • Press edit, after that, fill it with that HTML combination above.
  • Save it
You can add more link by copy paste another structure below or above the previous one.

For example:
<li><a href='#'>Title Here</a></li>

After all finish, then save.
The Second Menu
find this (Ctrl+F) :
<li><a href="PARENT-LINK-ADDRESS">PARENT TITLE</a></li>

below that code, you will find like this:

<li><a href='PARENT-LINK-ADDRESS'>PARENT TITLE</a></li>

Please, change PARENT-LINK-ADDRESS with your own targeted address.
After that, change the word PARENT-TITLE with your own title.
Save your template


125x125 Sponsor Banners

HTML Combination:
<li>
<a href="TARGET-LINK"><img style="vertical-align:bottom;" src="BANNER-125x125"/></a>
</li>

Please, change the words:
  • TARGET-LINK with your targeted web address
  • BANNER-125x125 with the address of your banner
That HTML above is for one image banner. You could edit that Combination in notepad or wordprocessor.

After editing,
  1. please go to LAYOUT -- add page element
  2. you'll see SPONSOR or Banner gadget
  3. press edit n paste your editing into it
  4. save it
To make another banner, in the gadget box, simply copy-paste below or above the previous content.

Customize Targeted Adsense 338 X 250

Go to Adsense.com, Use 338 X 250 Size, and please copy the code.
Convert your adsense code into entities.

Go to LAYOUT -- Edit HTML -- expand widget template
Find this code:
<div class="ad1">
<!-- Ad_code_section_starts -->

Below that codes, you'll see like this below:

<div class="ad1">
<!-- Ad_code_section_starts -->

<script type="text/javascript"><!--
google_ad_client = "pub-XXXXXXXXXXXXXX";
/* Scarlett Post Targeted */
google_ad_slot = "XXXXXXXXXX";
google_ad_width = 336;
google_ad_height = 280;
//-->
</script>
<script type="text/javascript"
src="http://pagead2.googlesyndication.com/pagead/show_ads.js">
</script>

<!-- Ad_code_section_ends -->
</div>

The blue text is my adsense code. Now, replace it with your code, the one that after converted.
After that, Save your template. Wait for 10-15, standard from Adsense, and your ads will show up...

Forex Press

Forex Press

Forex Press
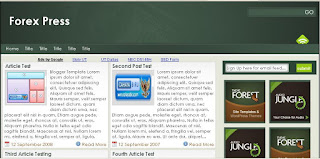
Forex Press is three column template. With dark green and white color combination, Forex press intended for money making, and news niche theme. The template is hot, please try it for your next blogging.

If you like my works and articles, you could subscribe in my feed form in right sidebar of this site.
Ok, Have a nice blogging.... :)

Install The Template


  1. Please Sign In to Blogger
  2. Go to LAYOUT -- Edit HTML
  3. If You need to back up your old templates, please do the back up first.
  4. Upload The Androida XML Files.
  5. Click the Upload button.
  6. Save your template.

Set The Feed Burner ID Form


Go to Layout – Edit HTML – no need to expand widget template
Find This Word:
CahayaBirusSphere


There are two place to change. After that, please Change it with your own Feedburner ID.

Customize The Menu


The menu link use a simple HTML combination.
<li><a href='#'>Title Here</a></li>

Please, change # symbol with your targeted address.
Change the word Title Here with your own title.
You can edit this in Notepad or wordprocessor.

after edit it, please Go to Layout -- Add Page Element
You will find FOX MENU GADGET.
Press edit, after that, fill it with that HTML combination above.
Save it

You can add more link by copy paste another structure below or above the previous one.
For example:
<li><a href='#'>Title Here</a></li>

After all finish, then save.

125x125 Sponsor Banners


HTML Combination:
<li>
<a href="Target link"><img style="vertical-align:bottom;" src="BANNER-125x125"/></a>
</li>

Please, change the words:
  • TARGET-LINK with your targeted web address
  • BANNER-125x125 with the address of your banner

That HTML above is for one image banner. You could edit that Combination in notepad or wordprocessor.

After editing,
  1. please go to LAYOUT -- add page element
  2. you'll see SPONSOR gadget
  3. press edit n paste your editing into it
  4. save it

To make another banner, in the gadget box, simply copy-paste below or above the previous content.

No Auto-Read-More Versions

Download Links Below are XML Template which set by No JS Auto Read More

Zinmag Monezine

Zinmag Monezine

Zinmag Monezine
Zinmag Monezine is brown stylist template which suitable for money making niche. Equipped with 728 width ads place, Monezine could increase your earning potentially. Please try the zinmag Monezine templates for your money making blog.

Install The Template


  1. Please Sign In to Blogger
  2. Go to LAYOUT -- Edit HTML
  3. If You need to back up your old templates, please do the back up first.
  4. Upload The Monezine XML Files.
  5. Click the Upload button.
  6. Save your template.

Customize The Logo


Go to Layout – Edit HTML – no need to expand widget template
Find this image address :

http://4.bp.blogspot.com/_xfdD6S9fOk4/Sdtaw3k77CI/AAAAAAAAAs0/OmnV03qCI0E/s1600/logo.jpg

The logo use image file. The size is 195 pixels width and 44 pixels height. We have attached the PSD file. Please make customization in image editor. After you make your own logo, Upload it into webhosting and get the link address.
After that, replace the above address with your own image address that you get in your webhosting.

Customize The Menu


The menu link use a simple HTML combination.
<li><a href='#'>Title Here</a></li>

Please, change # symbol with your targeted address.
Change the word Title Here with your own title.
You can edit this in Notepad or wordprocessor.

after edit it, please Go to Layout -- Add Page Element
You will find FOX MENU GADGET.
Press edit, after that, fill it with that HTML combination above.
Save it

You can add more link by copy paste another structure below or above the previous one.
For example:
<li><a href='#'>Title Here</a></li>

After all finish, then save.

125x125 Sponsor Banners


HTML Combination:
<li>
<a href="Target link"><img style="vertical-align:bottom;" src="BANNER-125x125"/></a>
</li>

Please, change the words:
  • TARGET-LINK with your targeted web address
  • BANNER-125x125 with the address of your banner

That HTML above is for one image banner. You could edit that Combination in notepad or wordprocessor.

After editing,
  1. please go to LAYOUT -- add page element
  2. you'll see BANNER or SPONSOR gadget
  3. press edit n paste your editing into it
  4. save it

To make another banner, in the gadget box, simply copy-paste below or above the previous content.

Big Banner 300 X 250


Go to Layout -- Page Element
you'll see Big Banner Gadget
press edit, copy paste your image, or 300 X 250 banner into the box.
Save Your Template

729x90 Adsense


Go to Adsense.com, and get your code.
Please set the color palette
Set to size to 728x 90


Border
#
Background
#
Text
#
URL
#


PUT IN YOUR ADSENSE INTO THE TEMPLATE

Go to LAYOUT -- Edit HTML
Find this code:

<div class='headbanner'>
<!-- Ad_code_section_starts -->

after you find it, you'll see like this

<div class='headbanner'>
<!-- Ad_code_section_starts -->
&lt;script type=&quot;text/javascript&quot;&gt;&lt;!--
google_ad_client = &quot;pub-XXXXXXXXXXXXXXXX&quot;;
google_ad_host = &quot;pub-XXXXXXXXXXXXXXXX&quot;;
/* Monezine Head Banner */
google_ad_slot = &quot;XXXXXXXXXX&quot;;
google_ad_width = 728;
google_ad_height = 90;
//--&gt;
&lt;/script&gt;
&lt;script type=&quot;text/javascript&quot;
src=&quot;http://pagead2.googlesyndication.com/pagead/show_ads.js&quot;&gt;
&lt;/script&gt;

<!-- Ad_code_section_ends -->
</div>

Replace my adsense (in green color) with your adsense code. After you replace, just wait for 10-15 minutes, then your ads will come up. 

My Simple Collections

Blog Archive

Free Blogger Template Cahaya Biru

Followers

Search This Blog